Tuesday, July 29, 2014

Blue Medieval Dress (~14th century cotehardie)


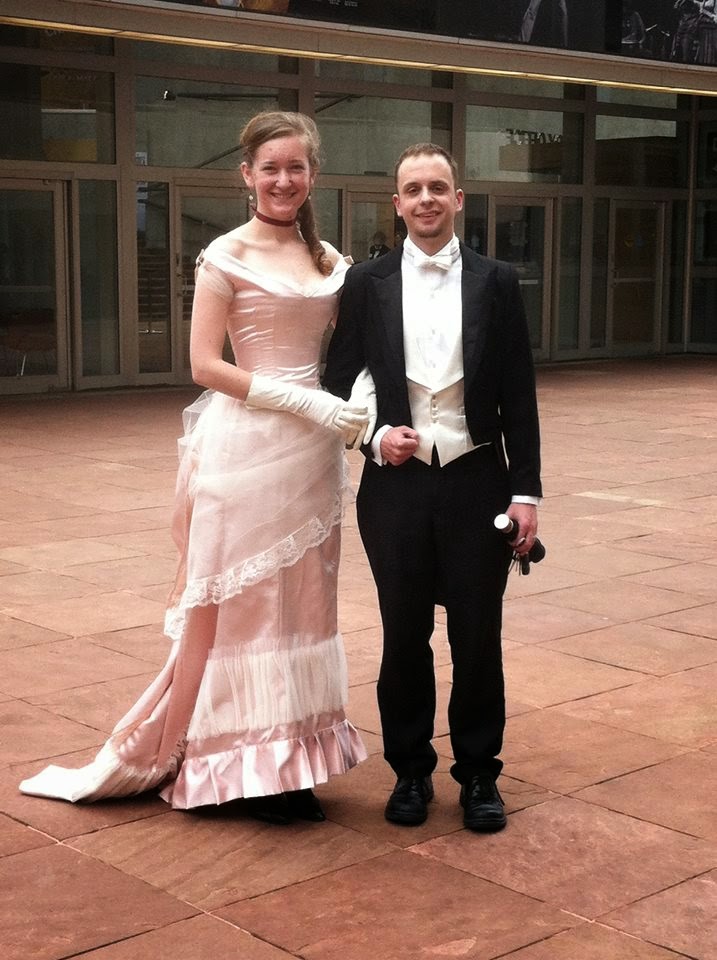
The finished pretty pictures :) Taken by the lovely Bermuda Jill of Smite Photography, on a semi-cloudy day in Evergreen, CO, USA.

***

This dress was made to wear to the Renaissance Festival. I had 3 parameters:

(1) I wanted something period (while not renaissance, medieval garb is also accepted)

(2) Something not crazy expensive/taking forever to make

 and (3)  I wanted to not be a thousand degrees sweltering hot while wearing it.

This led me to a style of dress I thought I could pull off well, made of Linen (wow, is it the BEST fabric ever to wear to faire! Never going back!).  I remebered that Tasha Kelly over at La Cotte Simple had made some tutorials on how to drape a cotte on one's own body, which I had always wanted to try.  This was the perfect opportunity!

You can see all the tutorials, here.  I used the curved-front seam method, as the straight-front seam method gives more push-up to the boob area and I didn't want that.

Since I have access to pattern-drafting software (really just a drawing program that works on an x-y axis) at work, and didn't want to try to wrangle that big piece of fabric on my own, I decided to take the darts out of my sloper, give it huge seam allowances, and then further fit it on my own body with some pinning and slashing.  
Also, I use the Patternmaking for Fashion textbook by Helen Joseph-Armstrong.  Many helpful tricks in there!

 Below are pictures of what I started with, and what I ended up with (the smaller and weirder-looking pieces are what happened after I had fit them on my body).  


The sleeve on the left is what I started with; on the right is the final sleeve.  The elbow dart was combined with the button placket that runs down the back of the forearm.  Thanks, clever pattern-drafting book!


Let me tell you, it was quite the puzzle; but I did manage to fit this entire dress on a 3 yard piece of 54" wide linen!  Awesomely economical.  I used a lightweight linen from Fashionfabricsclub.com.  Also I cut a lining for the bodice from hips to shoulders out of a stronger linen; the Euro linen suiting from Fabric.com. 


I decided to do a mix of hand-sewing and machine sewing.  I wanted it to look not machine-sewn but also be very durable (as I thought perhaps a mid-to-lower class woman's cotte would have to be), so I cheated where I could ;).  The seams themselves are sewn by machine, but then felled by hand. I didn't want the stiffness that machine-felling can sometimes bring. 
 All the edges except the hem are finished by hand, and the eyelets were done completely by hand.  The buttonholes are sewn by machine :) Haha.  That many buttonholes is too much crazy for me to do by hand, and I thought the effect would be much the same.


 My seams were sewn in the usual 5/8" manner, and then finished as below...

sewn, treating the bodice lining-linen as 1 piece with the self (outside) fabric

(1) trimming down 1 side of the seam allowance to about 3/16"


(2) pressing under the edge of the longer seam allowance and folding it over

(3) hand-whipstitching that folded edge down to make a beautiful finish!

Where the triangles were inserted (in each seam), one felled seam simply ran over the edge of the other and continued up the body.  This picture is of the hip area.

~~~~~~~~~~~~~~~~~~~~~~~~~~~~~~~~~~~~~~~~~


This was my  center-front edge.   It was folded over 1", then the raw edge was pressed under by another 1/4" and hand-whipstitched down.  I used an awl to poke through and some silk buttonhole twist thread to make *drumroll please* 56 eyelets in total!!! It took a couple of afternoons, going about 5 minutes per eyelet.  

The sleeve and neck edges were simply pressed 1/4", rolled to the inside twice, and hand-whipstitched down.  The hem was machine rolled by pressing up 1/4", stitching, then rolling that up by 3/8" and stitching that down too.

***
 If I made another one I would use Tasha Kelly's sleeve draft.  Mine didn't have enough lift to be really comfortable in the shoulders. I could drive in the sleeves, but they definitely couldn't lift higher than that.   I would also give myself a tiny bit more room in the back-shoulder area and across the chest; it was a little too tight!  Lesson learned. :)  There may be an over-dress made for this in a navy fabric, so stay tuned!


Thursday, June 5, 2014

Final pic and more construction


 So, it's a camera-phone picture.  But here it is! :)  Later on after I fix a few things, I will take better pictures of the outfit (including back views and such).
 I wore the thing to the Colorado Symphony with my lovely husband.   I also made the shirt, vest, tie, and tailcoat that he is wearing. 

 I think last time you saw it, it was only in the muslin stage.  So I started with a base of underlined pink satin--just a simple 6-panel skirt with the bit of train-swoop in the back.

 For that tulle apron, I just pinned and draped until it looked like I wanted it to, and then I attached the lace to the edge.  It is all one 4-layer piece of tulle yardage; there's no seam on the right hip.  Just the left hip, where it goes into the zipper closure (*gasp!*  I cheat.  I also used a serger to finish all the skirt seams and edges...but I'm pretty sure that if the Victorian seamstresses had owned sergers, they would have used them!).


For the big pink ruffle at the bottom, I actually did not gather it at all. Instead I made a 7" tube of satin, lightly pressed it, and pleated only the top edge to the skirt.  It made a fun, dimensional effect that I really liked.  After that, I added the crazy pipe-organ ruffle above it, like so...


I would pin one edge, using my finger for a spacer, then pin the other edge to match.  It's 4 pieces of tulle treated as 1 piece.  It definitely took longer than expected, but I got faster near the end!

The back drapery piece is simply a very giant rectangle, underlined in muslin and edged in lace, like so:


 And then I pleated it onto the back waistband area, before actually attaching the waistband:

I cheat :) It has an invisible zipper at the left hip.


I picked up a few points in the middle of the drapery piece and tacked them up near the waistband to give it this effect.

~~~~~~~
On my original sketch, I had planned to put fabric roses and leaves on the shoulder tips, at the hip, and wrapped around that layer of pipe-organ pleats.  But I decided that the rose garland I had bought was just too overwhelming, and so it only was applied at the hip, where the zipper is.
~~~~~~~~~~~

The bodice!

It's boned with non-period 1/4" rigilene.


Rigilene can be sewn through by machine, so it is a breeze to install because all you have to do is run a big long stitch down your seam allowances and it's in! No casings, no tragic snapping of basket canes, no cutting and tipping of spiral steel...*sigh* it's pretty nice.  And I use it here because I thought it would be the best way to get the silhouette I wanted.  It's flatter than steel or cane, and somewhat heat-mouldable as far as curves.


As you can see, the bodice is underlined with muslin.  The eyelets are all poked with an awl, then just whipstitched with a nice buttonhole twist thread around the inside edge to hold them in place.  When finished, it will lace up the back and the edges will meet (so there's no skeezy corset-effect of skin showing).


Which took about 2 hours, I believe.  Not too bad!

The little cap-sleeves were just rectangles of tulle.  I pinned them till I got the effect I wanted (nice and bunchy at the front and back and underside, but tapering away at the top of the shoulder), then stitched them down on the inside armhole.  The velvet bows were made by cutting lengths and stitching them together, then applying it to the dress in the same vein (small whipstitches and tack stitches).


Yep! That was pretty much it :)  There were originally plans to use a lot more of that velvet ribbon on the back, but after pinning it on, I decided I liked the simple seam lines on their own and that the velvet was overwhelming.

There was no petticoat worn underneath, just a good corset and a modern slip.  I did wear these fantastic vintage shoes....

And the gloves are kid gloves from the 1950s (never worn before I wore them, apparently! They still had the tag).

~~~~~~~~~~~~~~~~~~
Total pricetag: ~$150.00
Total Hours: ~ 40 
Seeing many old people smile: Priceless
~~~~~~~~~~~~~~~~~~~


I may in the future actually do the extra work of adding the velvet ribbon strapwork on the back of the bodice, and all the extra flowers.  I think they would take it from my modern idea of Victorian into really period Victorian--but it's just a little over-the-top for my very simple sensibilities.   I learned quite a bit about skirt shapes and working with satin from doing this dress, and had some fun trying out the new and strange ruffles.    I don't know if I would make another one for myself, but I'd be happy to do one for a client.


Thanks for following the journey of this dress!   Stay tuned; there are plans for a medieval-inspired dress in the works, and Sabriel is still slowly progressing. :)


Monday, April 28, 2014

Sabriel's bell set

The Abhorsen would be lost without her bells!  For those of you unfamiliar with the story, the bell set is meant to work as a sort of counter-necromancer's tools.   Each bell has its own name and function (which you can check out on this extra-nerdy wiki page.  Keeping the dead down, instead of raising them up.   Stopping the zombie apocalypse. ;)


Aren't they pretty?!  


My bells were all random ceramic bells bought from varied sources (Etsy, eBay, and even a random Kansas gas station).   They started out as shown below:

I used 3 different products to get them all nice and silvery:  (in order of application): Some model-car paint color (2 coats), Liquid Gold Leaf, and some spray-on clear varnish.

 DO NOT use your best, most favorite brush for this project!!! But get something that won't shed stray hairs every moment.  I think this brush was an acrylic brush from hobby lobby.


The first thing is to clean them of any dust, etc. and temporarily remove any clapper-like devices:

The biggest bell had that weird chain/washer situation because the handle was wood and therefore removable, but most had a bit of wire with a ceramic knocker/clapper.

Then paint them with the silver model-color inside and out, letting it dry between coats (I waited about a day usually):


After the model-color is dry, apply the 1 layer of silver-leaf paint (the bell here on the LEFT has silver leaf, the one on the right just has 2 coats of model-color).  I propped the edges up with that bamboo skewer to let the inside get some air and be able to dry completely.

If you ever need to clean silver-leaf out of your brush...nail polish remover and dish soap got most of it out.  But the bottle recommends Xylene.


At this stage they looked quite nice and shiny! But the silver-leaf needs some kind of protective coating in order to not get tarnished from your handling.


And they're done!
It doesn't show up well in this photo, but the clear-coat I used had sort of an antiquing effect on a few of the bells.  It would settle into the crevices and turn a darker gold color.

The best part is that I can ring all of the bells. C:  And they sound totally pretty.  Not quite as good as a real brass bell, but still pretty.

The next part here is to make the bell bandolier that holds all the bells!  I like the cover below the best for design, but I think I would turn them 'round so that you would open the flap and grab a bell by the clapper from the bottom edge of the bandolier instead of the top.


Stay tuned for more progress as I work on this long-term project!


Monday, April 21, 2014

Abhorsen: Beginnings, tests, and bead-armor

I started this costume a few months before I started the blog, but as it is a very large, long-term project, I will document its construction and process here as well.

 ~~~~~~~~~~~~~~~~~~~~

    One of my favorite fantasy series is the Abhorsen trilogy, by Garth Nix.  I picked up the middle book, called Lirael, totally by chance.  I was a teenager in a library, and it had a beautiful cover. Also the first book was checked out, unbeknownst to me. ;)           


I love the world of these books and I still re-read this series from time to time.  While Lirael has a special place in my heart as the shy, bookish teenager who just wants to belong, the costume of the first book's heroine is much more striking....


I mean just....wow.  Check out all that embroidery! And bells! and a sword! There are a few Sabriel cosplays out there already, but I want to do a more couture version and really bring out the ooooh SHINY factor.

~~~~~~~~~~~~~~~~~~
I decided to go mostly with the design that these lovely book-cover artists (Leo and Diane Dillon) came up with--changing some small things.  My surcoat is going to have the same neckline, colors, trim, and basic shape, but the bell sleeves will end at the elbow instead of having the long trailing bits.   I'm basing the bottom half on a standard medieval tabard-- basically squared down from the hips, ending about knee-level, with a riding slit at the front right leg up to just under the hip.

Some surcoat embroidery tests on wool crepe scraps, with good ol' DMC silver and gold thread...


I decided I liked the silver keys by themselves better than with the gold 7-point stars (a feature of Lirael's character, those stars).  My fabric for the real thing is a lightweight wool crepe.

After a few tests and calculations, I decided to make the armor layer (described in the book as tiny-scaled, almost ceramic in nature) out of beads. Totally not practical as actual sword-stopping armor, but it looks pretty fabulous.  Perhaps think of it more like a ceremonial, formal-occasion version of Sabriel--not so much the out-in-the-field fighting the enemies version.

I considered using Tilapia fish leather (wild, I know!) as a more obviously scaly option.  It was somewhat expensive, but looked pretty and would have been slightly faster than couching rows of strung bugle beads, as I did decide to do (below, on the left).  The real decider was the awkward shape, size, and inflexibility of the leather, as well as its 1-way pattern.

So, what I am doing for the armor layer is couching these beautiful Ming Tree rainbow grey 1/4" bugle beads onto a layer of black medium-weight linen.  Hopefully lightweight enough to breathe at faire, but sturdy enough to hold the weight of all that glass.

It's been awhile since I started the beads, and I've got the collar and most of the right sleeve done.  Here are some in-progress pictures of the pieces on the loom ( a sturdy scroll-frame model meant for needlepoint).


The beads are only going where they'll be seen, of course-- the sleeves from about mid-bicep down to the wrist, and the neck pieces in front and back.  I'm making a whole armor-layer piece of linen, but these beaded pieces will be seamed onto the base armor-layer.   The armor layer stops about hip level, so there may be a bit of beading that has to go on where the riding slit starts at the hip, but I'll wait and see.

 The pattern pieces were drafted from my basic torso sloper made with help of the lovely textbook Patternmaking for Fashion Design. The armor layer muslin looked like this...

with the sash to stand in visually for the bell bandolier. I like the belt, so I may end up using it in the real thing depending on what kind of leather/faux leather I decide on for the bandolier and scabbard.

 I will add the nice swallowtail bits sticking out of the wrists and collar on the finished armor--probably white silk chiffon or something equally wispy.   Also it will close up the back and not the front ;)

~~~~~~~~~~~~~~

More posts coming as I work on this project!